How to remove and install a Haldex clutch
AvtoAd
04/10/2022
How to remove the Haldex clutch
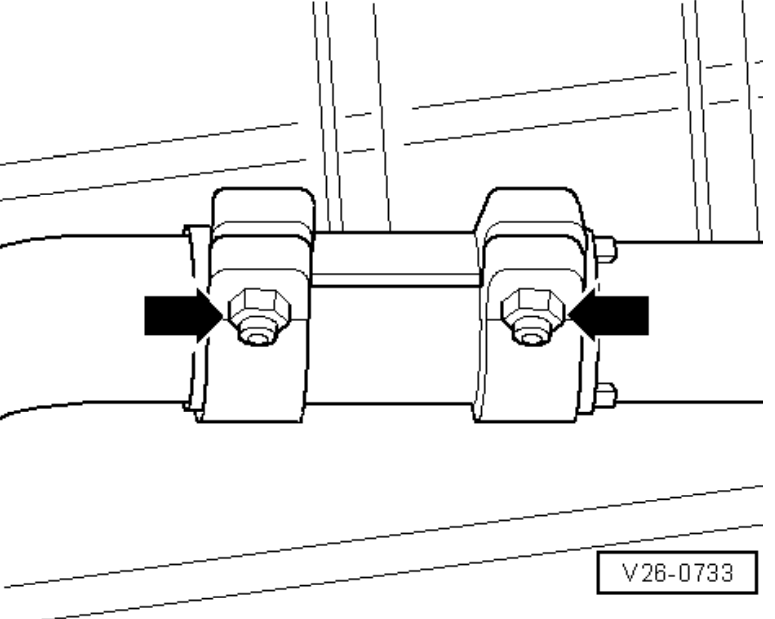
1. Unscrew the nuts of the connecting sleeve and push it back.
2. We tie the receiving tube to the bottom of the car.
3. We remove the rear part of the exhaust system.
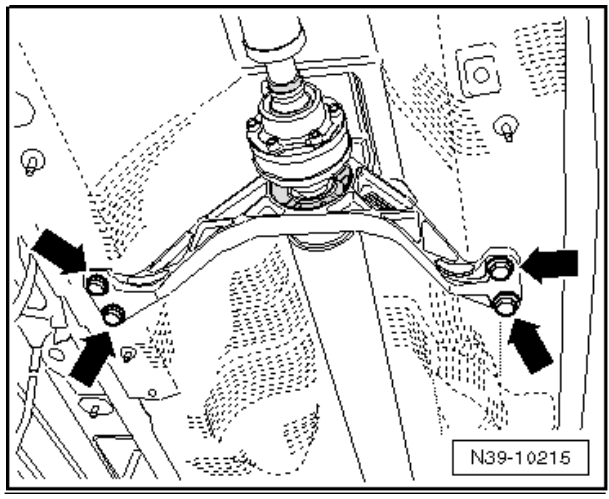
4. We loosen the screws of the intermediate support of the drive shaft of the rear axle (do not unscrew them at all).
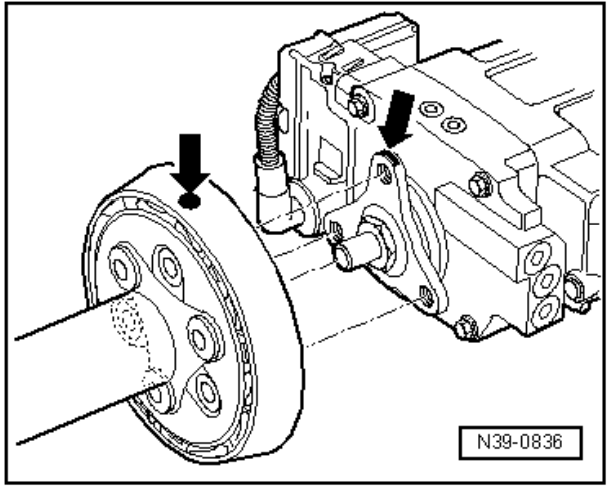
5. We check whether there are markings (color marks) on the spring coupling and the drive shaft of the rear axle/flange of the rear main gear. In the absence of marking, note the relative location of the elastic coupling/drive shaft of the rear axle and the flange of the main gear.
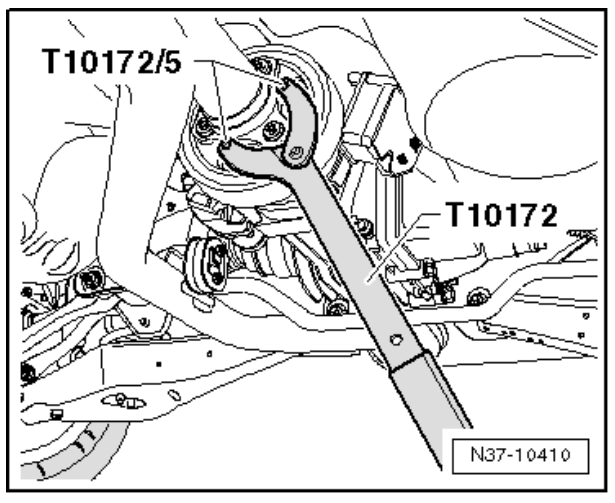
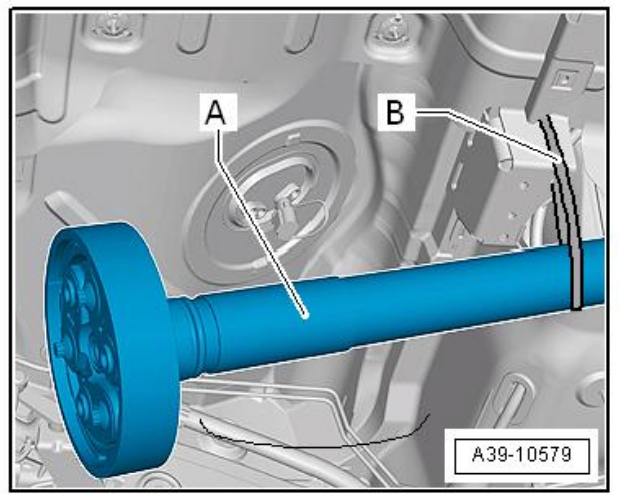
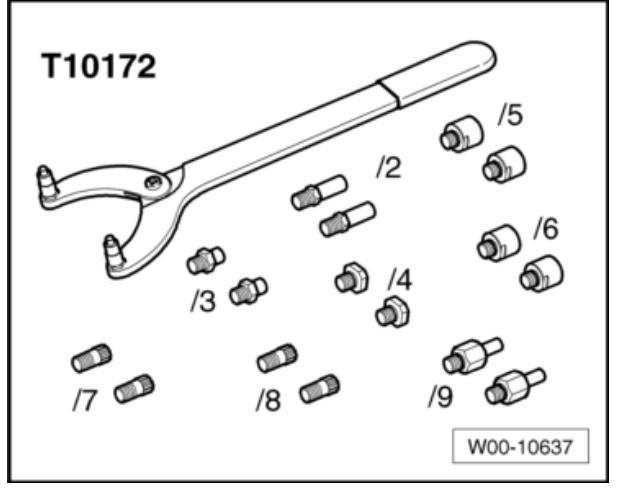
6. To loosen the bolts, we hold the drive shaft of the rear axle on the main rear gear using the stop T10172 and the adapter T10172/5.
7. We unscrew the bolts of the drive shaft of the rear axle on the main rear gear of the arrow.
8. We remove the drive shaft of the rear axle from the centering neck of the flange on the main rear gear, while slightly pressing the shaft forward. We turn out the bolt of the drive shaft of the rear axle of the intermediate support.

9. We connect the drive shaft of the rear axle A from the side to the body, for example, with the help of wire B.
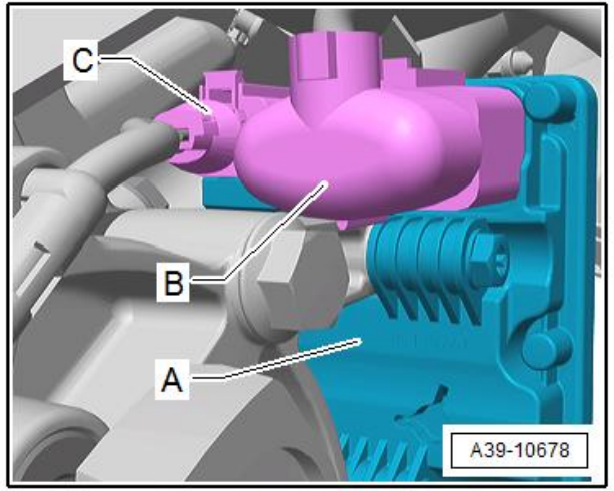
10. Disconnect the connector from the four-wheel drive control unit J492A.
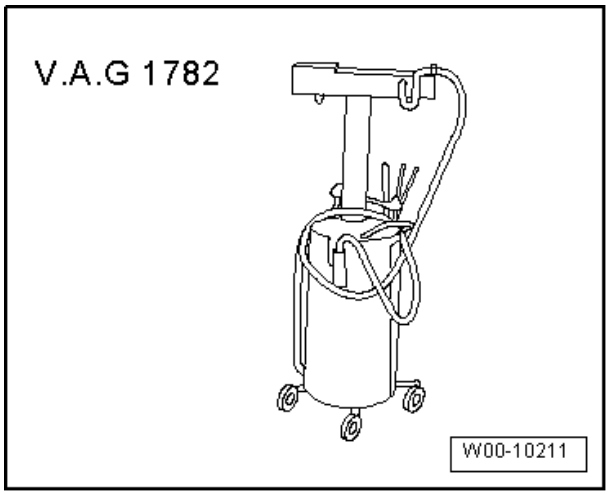
11. We install the VAG 1782 oil pumping device under the main gear.
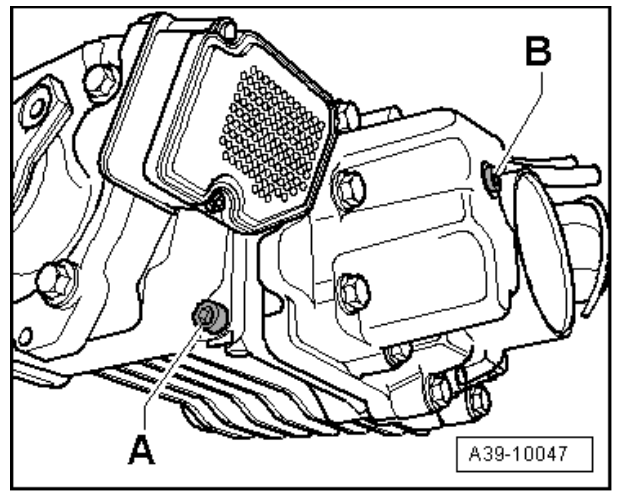
12. We unscrew the threaded plug of the drain hole A and completely drain the oil for the Haldex clutch.
13. We screw in the threaded plug of the drain hole A with a new sealing ring and tighten.
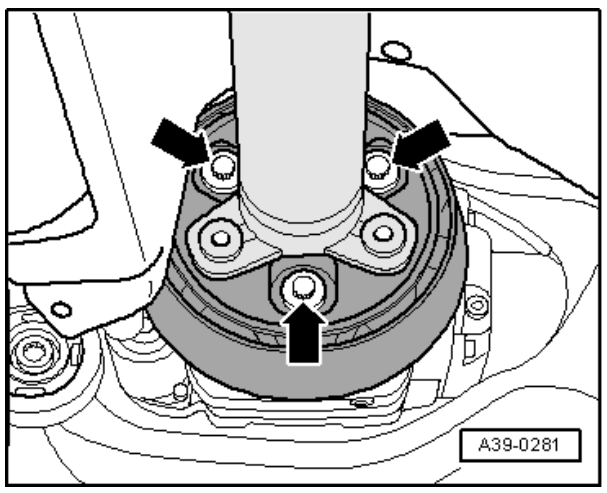
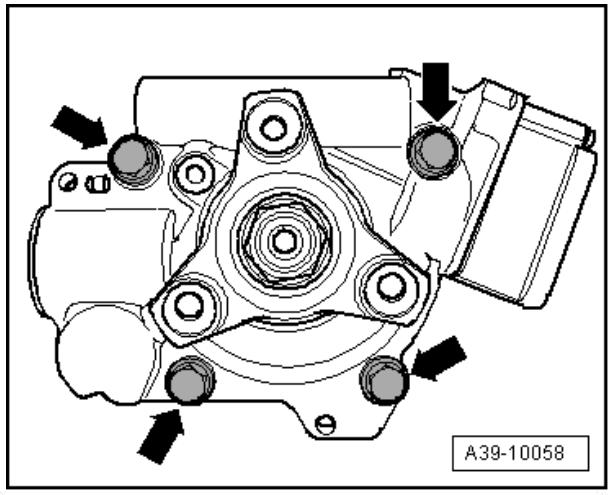
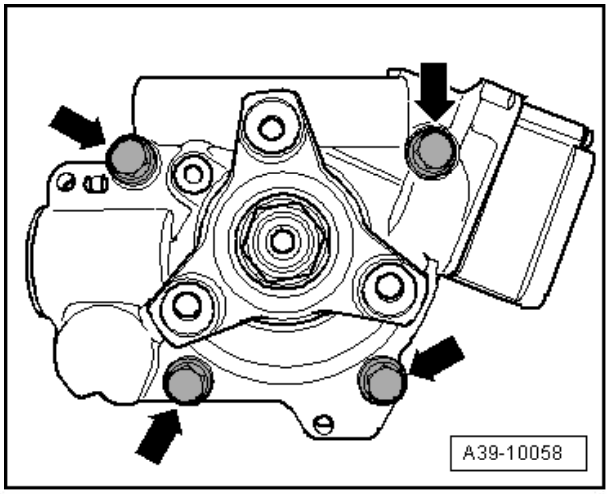
14. Unscrew the fastening screws and remove the Haldex clutch from the rear main gear.
Read more about Haldex generation V all-wheel drive clutch here.
How to install a Haldex clutch
Installation is carried out in the reverse order, taking into account the following:
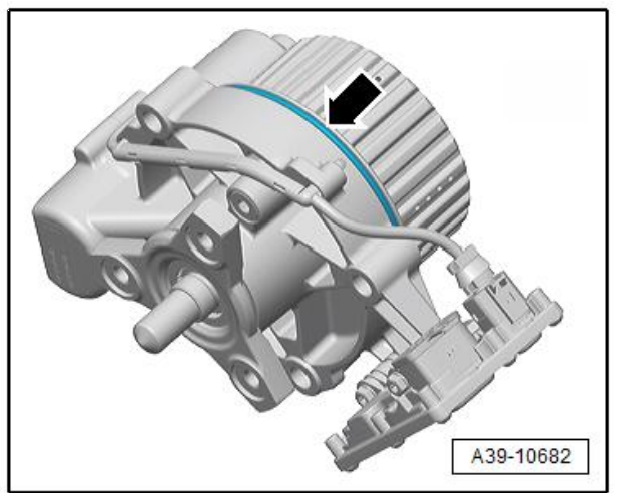
1. Remove the sealing ring from the Haldex coupling.
2. We install a new sealing ring and lightly lubricate it with Haldex coupling oil.
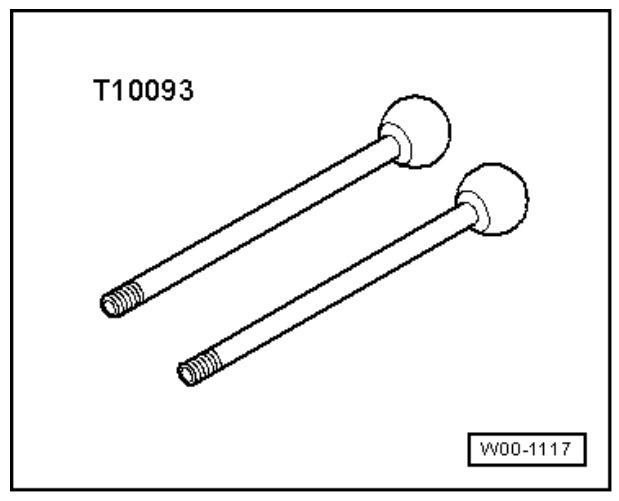
3. We install the Haldex 1 clutch in the main rear gear. We screw in the T10093 guide rods for precise insertion.
4. We turn the mounting flange of the drive shaft of the rear axle 2, install the Haldex coupling to the end.

5. Tighten the screws to the specified torque.
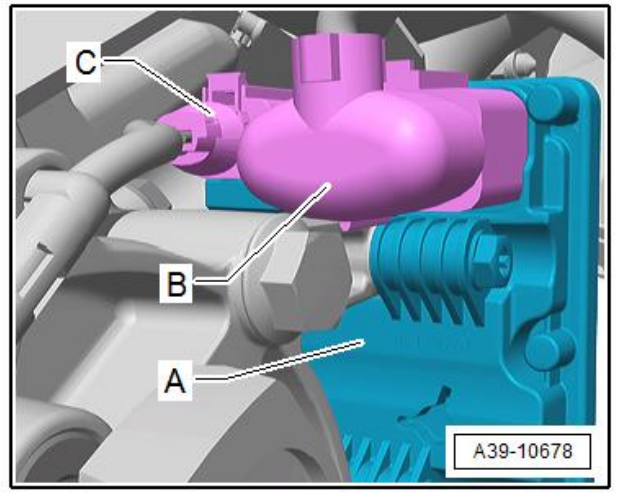
6. Connect connector B to the four-wheel drive control unit J492 A. Connector C must be connected.
7. Screw the drive shaft of the rear axle to the main rear gear.
8. Install the exhaust system and align it without stress
9. Add oil for Haldex clutches and check the oil level in the Haldex clutch.
How to replace the oil in the Haldex clutch - find out here .
Tightening torque:
Oil drain plug for Haldex couplings - 30 Nm.
The tool for removing and installing the Haldex clutch requires the following special devices, control and measuring devices, as well as auxiliary means:
- Guide rods T10093.
- Remover T10172 with adapter T10172/5.
- Device for pumping oil VAG 1782.
If you are interested in how to drain and add oil to a Haldex clutch, click here .
Read more about the 4MOTION all-wheel drive with Haldex clutch model year 2004 on our website .