Replacing the vacuum drive of the turbocharger

AvtoAd
09/08/2022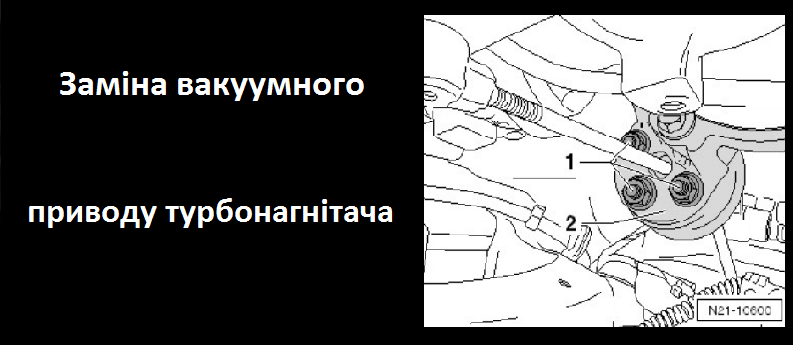
How to remove the turbocharger vacuum drive
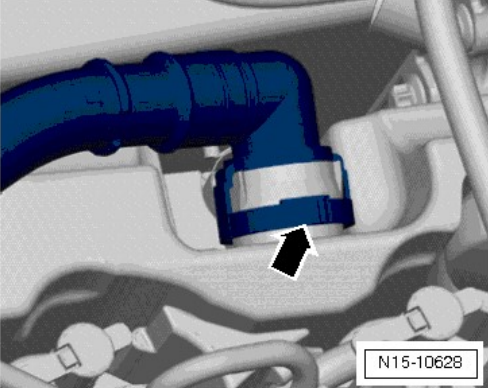
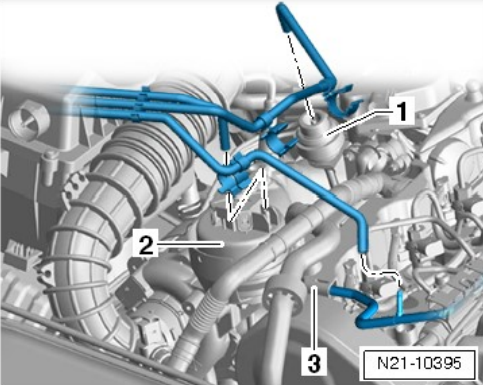
1. Disconnect the tube on the cylinder head cover.
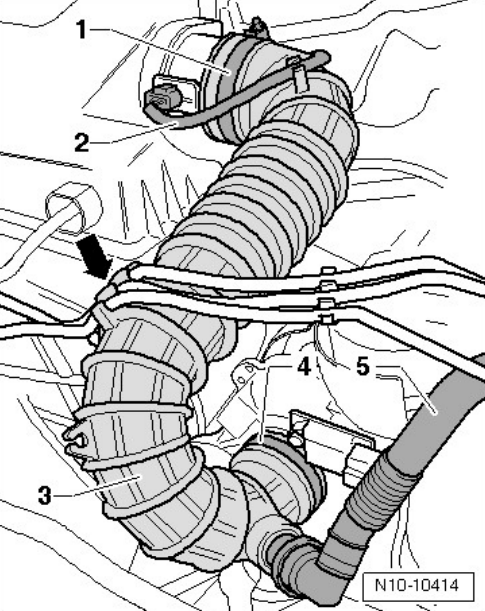
2. Remove the vacuum hoses from the holder of the arrow connecting hose ( 3 ).
3. Unlock and disconnect the wire harness connector ( 2 ). Remove the wiring harness ( 2 ) from the holder of the connecting hose ( 3 ).
4. Open the clamps ( 1 ) and ( 4 ).
5. Remove the connecting hose ( 3 ).
6. Disconnect the hose from the G584 control valve potentiometer.
7. Disconnect the hose ( 1 ) from the vacuum drive ( 2 ).
8. Unscrew the lower fastening nut ( 3 ) of the adjusting rod ( 5 ).
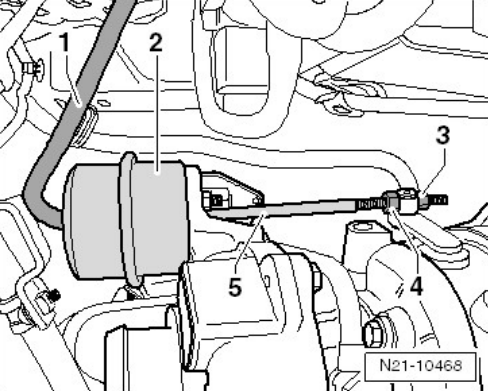
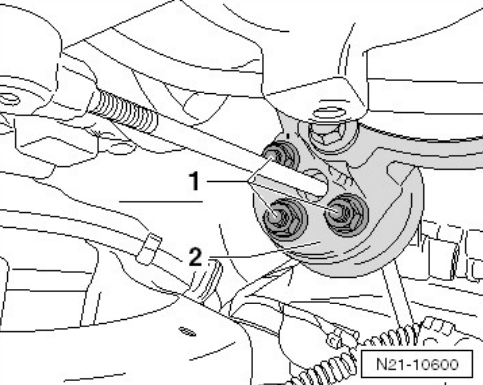
9. Unscrew the nuts of the vacuum drive ( 1 ) and remove the vacuum drive ( 2 ).
How to install a turbocharger vacuum drive
Installation is carried out in the reverse order, taking into account the following:
1. The contact surfaces of the vacuum drive should be thoroughly cleaned.
2. If necessary, unscrew the lower fastening nuts ( 3 ) of the regulating rod of the new vacuum drive ( 2 ).
3. Install a new vacuum drive ( 2 ) and pass the regulating rod ( 5 ) through the regulating lever to the turbocharger, as shown in the figure.
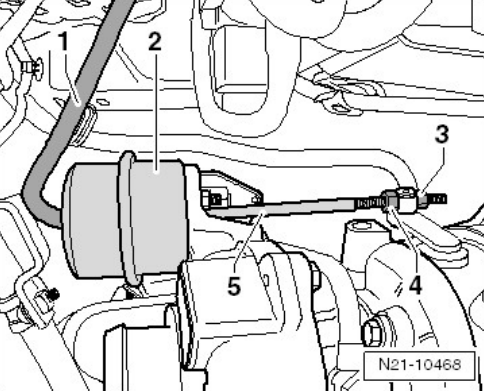
Important : the mounting mark on the vacuum drive must match the mounting on the turbocharger.
4. It is necessary to assemble the vacuum drive ( 2 ) with nuts ( 1 ) and tighten the fasteners.
5. Turn the fastening nut ( 3 ) by hand on the adjustable rod in the direction of the vacuum drive.
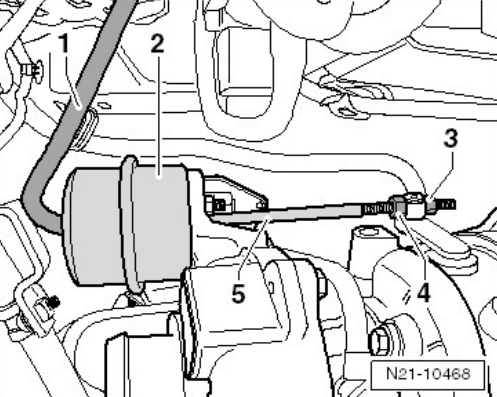
Important : it is necessary to ensure that the movement of the guide lever of the damper along the regulating rod is ensured.
6. Connect the VAG 1397A turbocharger tester ( 2 ) and the VAS 6213 manual vacuum pump or the VAG 1390-3 manual vacuum pump using a tee to the vacuum hose of the vacuum drive ( 1 ).
7. Turn on the VAG 1397A turbocharger tester and move the slide switch on the tester to position II .
8. Apply a vacuum of 390±10 mbar to the vacuum drive.
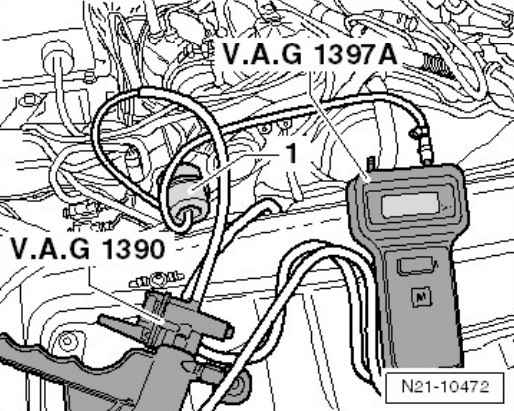
Important : the following adjustment work must be performed carefully and accurately, otherwise you can damage the turbocharger.
9. Set the damper lever ( 4 ) on the turbocharger in the direction of the arrow to the "closed" position.
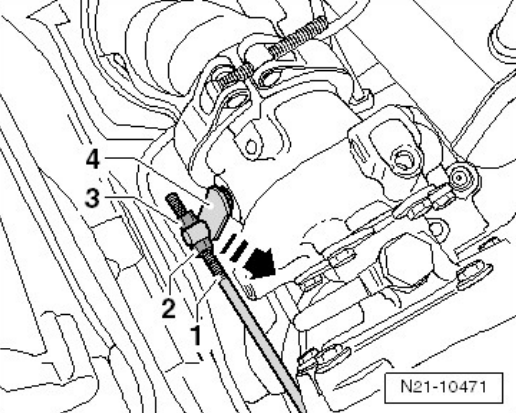
10. Turn the fastening nut ( 3 ) in the direction of the vacuum drive unit until it touches the damper lever, and tighten the counter nut ( 2 ).
11. Reset the vacuum again and once again apply a vacuum of 390 ± 10 mbar to the vacuum drive.
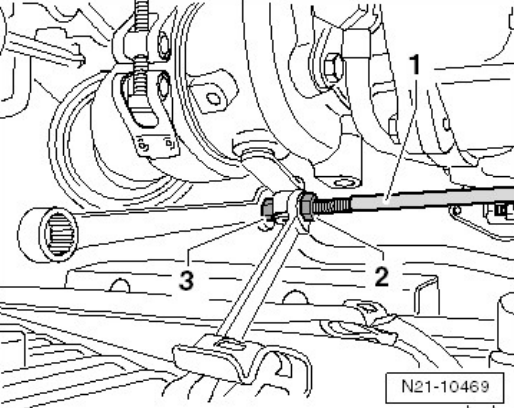
12. Check the adjustment value, readjust if necessary - repeat this operation 3-5 times.
13. Reset the rarefaction again.
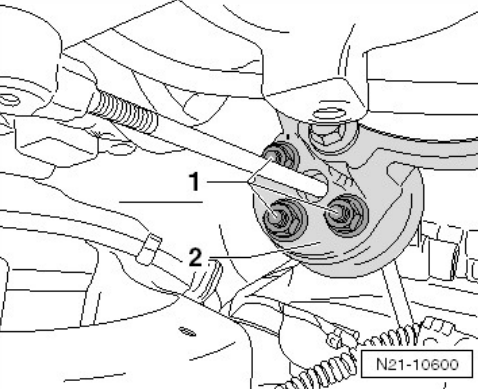
14. Fasten the VAS 6079 watch-type indicator using the universal tripod VW 387 to the turbocharger using the appropriate bolt ( 1 ) (as shown in the figure) and install it on the end of the regulating rod ( 2 ).
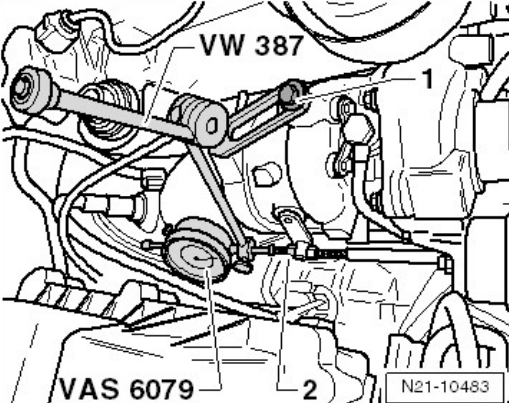
15. Operate the manual vacuum pump VAS 6213 until the VAG 1397A turbocharger tester shows a pressure of 390 ± 10 mbar.
16. Set the watch type indicator VAS 6341/1 to 0.
17. Continue to operate the manual vacuum pump VAS 6213 until the VAG 1397A turbocharger tester shows a pressure of 410 ± 10 mbar.
18. Consider the value on the VAS 6079 hour-type indicator.
19. The value on the watch type indicator VAS 6079 should stop changing.
20. If the value changed, then adjust the adjustment of the vacuum drive and repeat the measurement until the adjustment coincides with the specified values.
21. Seal the nut and locknut with a special varnish (ceramic) from the repair kit.
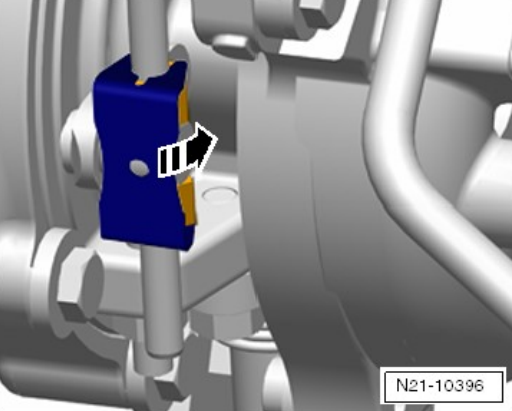
22. Put the locking clip from the repair kit on the adjusting rod and turn it 90° in the direction of the arrow.
Tightening torque:
Lock nut of the adjusting thrust - 8 Nm.
Nuts of the vacuum drive unit - 8 Nm.
And for the procedure we need the following devices:
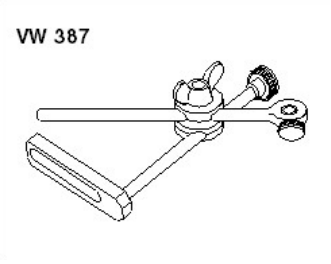
1. Universal VW 387 sentry-type indicator tripod:
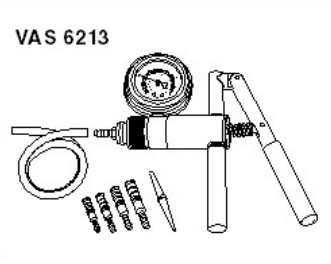
2. Manual vacuum pump VAS 6213 or manual vacuum pump VAG 1390:
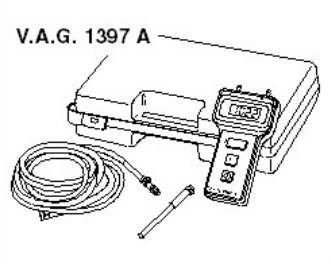
3. VAG 1397A turbocharger tester:
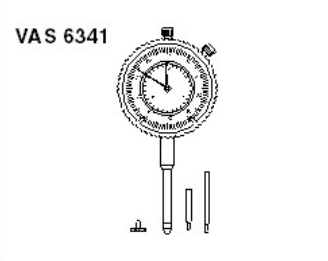
4. Clock-type indicator, a set of 4 VAS 6341 elements:
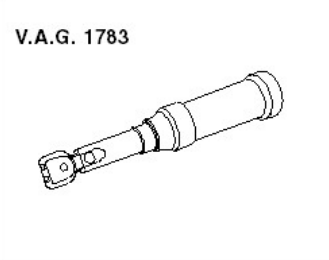
5. Torque wrench VAG 1783 with a 10 mm horn insert VAG 1783/1: