How to install 3GP for MMI

AvtoAd
19/10/2022
Content
1. Disclaimer (from the author).
2.1. Audi A1 .
2.2. Audi A4-A5-Q5-Q7 .
2.3. Audi Q3-A6-A7-A8 .
3. Prepare the SD card with the firmware.
5. User-defined mode .
6. Specific Bose .
7. Firmware update .
8. UPDATE INSTRUCTIONS FOR MMI 3GP (7T6).
10. Activator .
12. 03276 - "Check software version control.
13. Compute the new SVM code .
Reservation
This document is provided to you free of charge, feel free to study and use it. At no stage do I assume responsibility for your actions or any of my writings that may mislead you. So, as with my other documents, I say use at your own risk.
Disclaimer: Use this guide at your own risk, we are not responsible.
Warning: If your car is equipped with a BOSE or B&O sound system (8RQ or 8RY), read the DSP section carefully.
Important: Connect the car to a charger or leave the engine running.
Important: Some users report problems when copying files from Mac OS / Linux, it is better if you use Windows for all file copying processes. You can use a virtual machine for this.
Recommended: Read the entire guide before starting, double-check all steps and follow them carefully.
Prerequisites
MMI 3G+ systems with corresponding PR number: MMI Navigation Plus – 7T6.
Get the software updates you need.
Audi A1
8R0 906 961 EC – HN+_EU_AU210_K0900 (A1)
Audi A4-A5-Q5-Q7
8R0 906 961 FC – HN+_EU_AU3G_K_0942 (A4/A5/Q5/Q7)
8R0 906 961 FB – HN+R_EU_AU_K0942 (Q3/A6/A7/A8).
High-quality SD Class 10 for faster (and safer) file handling. Individual firmware updates are less than 1GB, but the card is 29.1GB, so 32GB SD.
Activate the hidden "green" menu.

Prepare the SD card with the firmware
Format the card with the FAT32 file system, and then copy the files from the first software update. The card should look something like this:

Important: do not perform any diagnostic work with the help of the VAS tester, as well as any other actions.
Important: remove the SIM card from the MMI.
Important: Do not remove the SD card with the firmware from the MMI during the update.
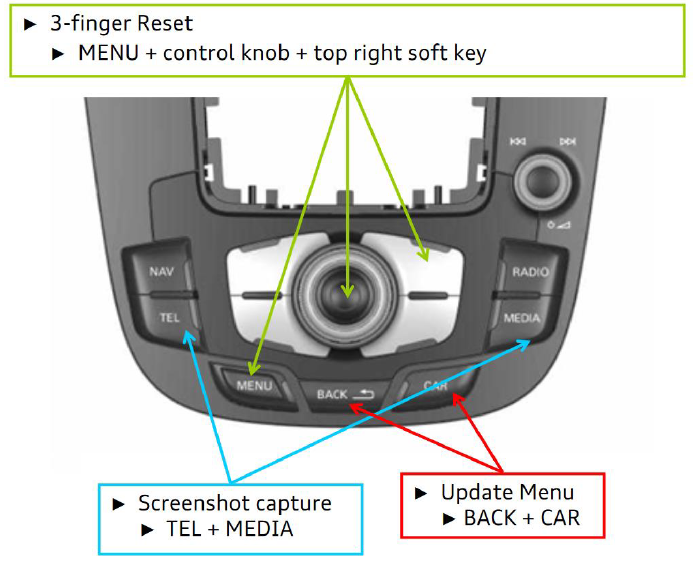
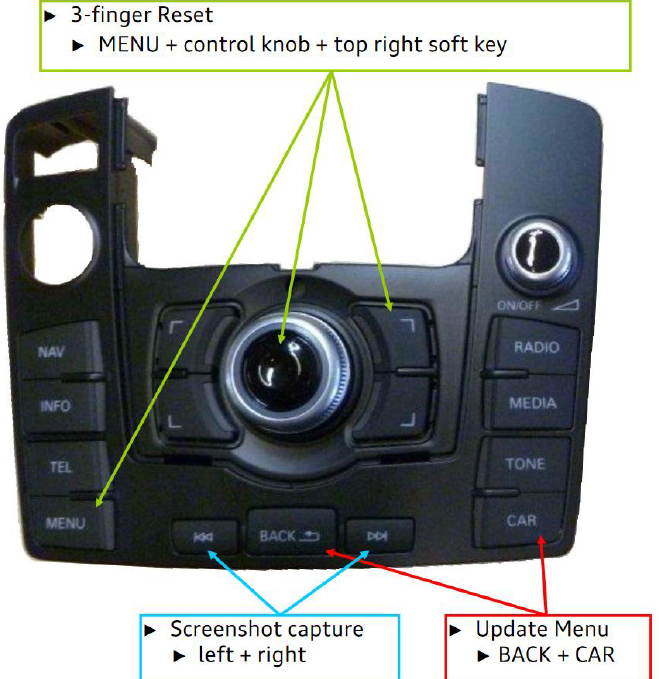
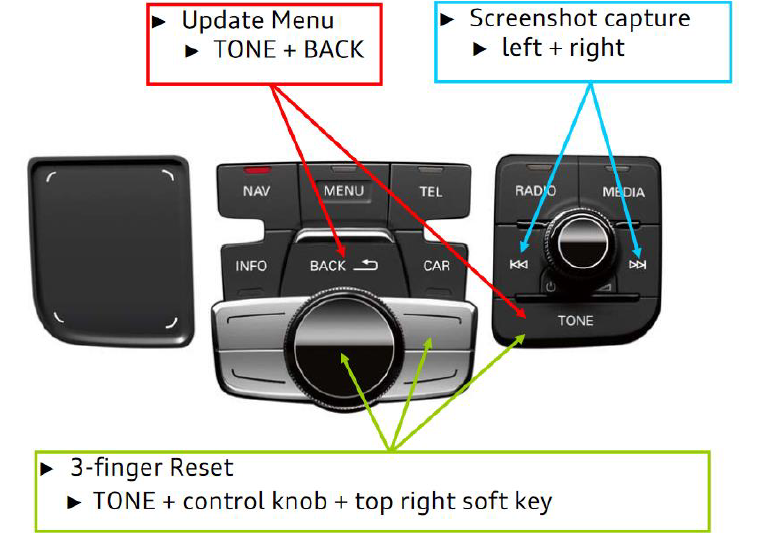
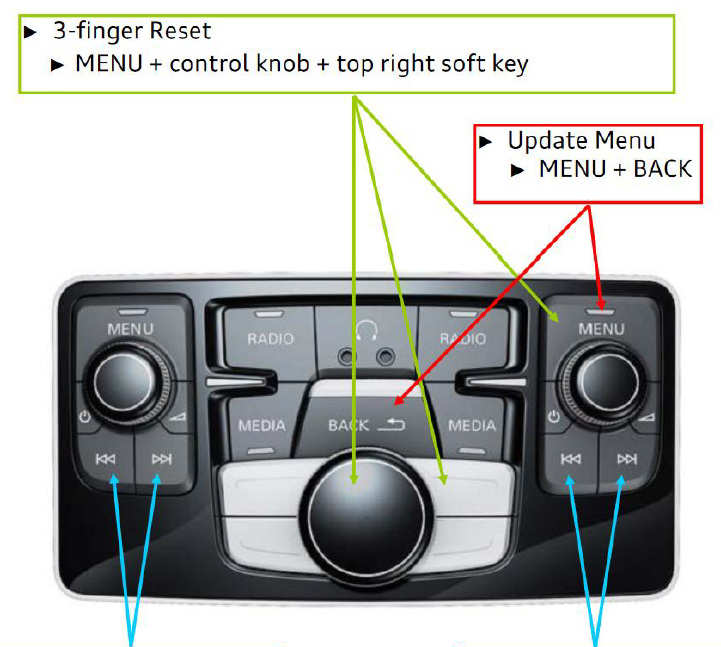
MMI key combinations
This document provides the following keyboard shortcuts for each MMI system:
• Three-finger reset (MMI restart);
• Update menu (Engineering menu);
• Take a screenshot.
Note the appropriate vehicle type and infotainment system to determine the correct key combination.
Note: Follow the keystroke sequence as described on the following pages - press and hold the buttons in the order described.
MMI 3G (radio plus)
A6 (C6), Q7
MMI 3G (navigation plus)
A6 (C6), Q7
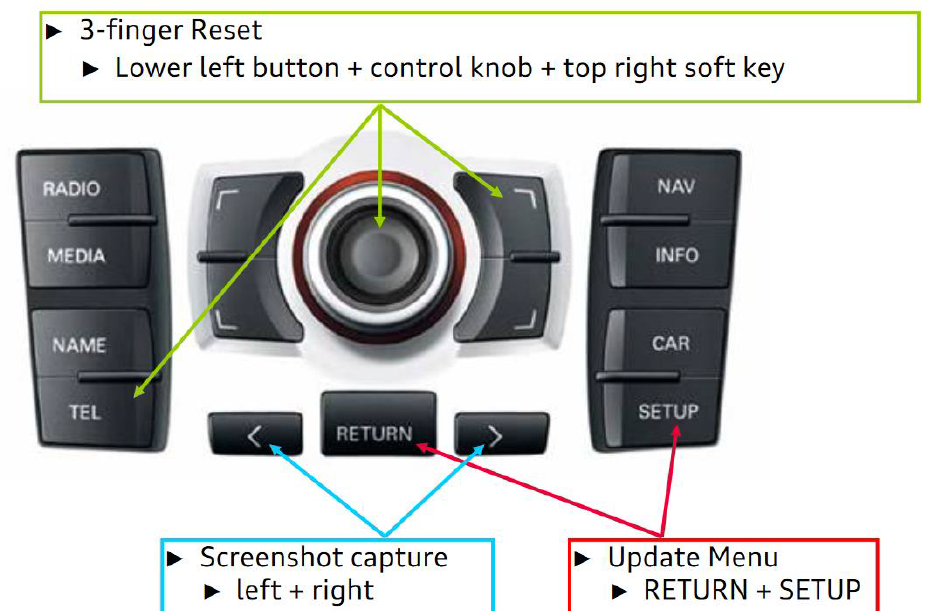
MMI 3G (navigation plus)
A4, A5, Q5 (before MY2012)
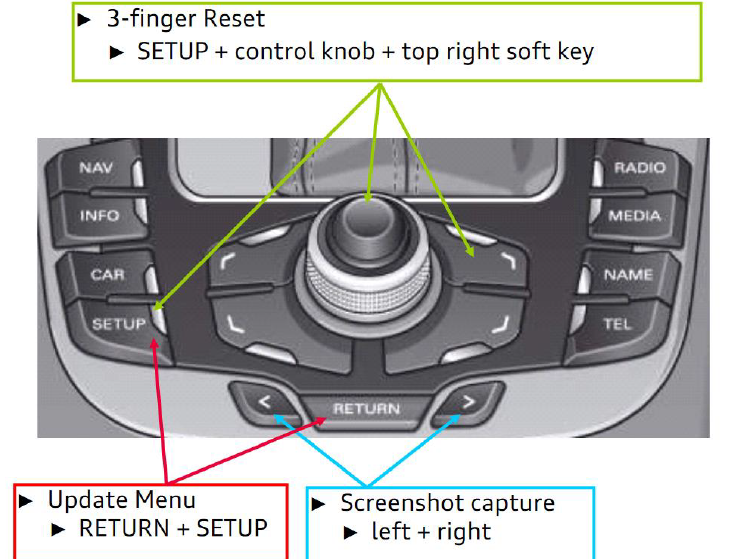
MMI 3G+ (navigation plus)
A6 (C7), A7 (C7)
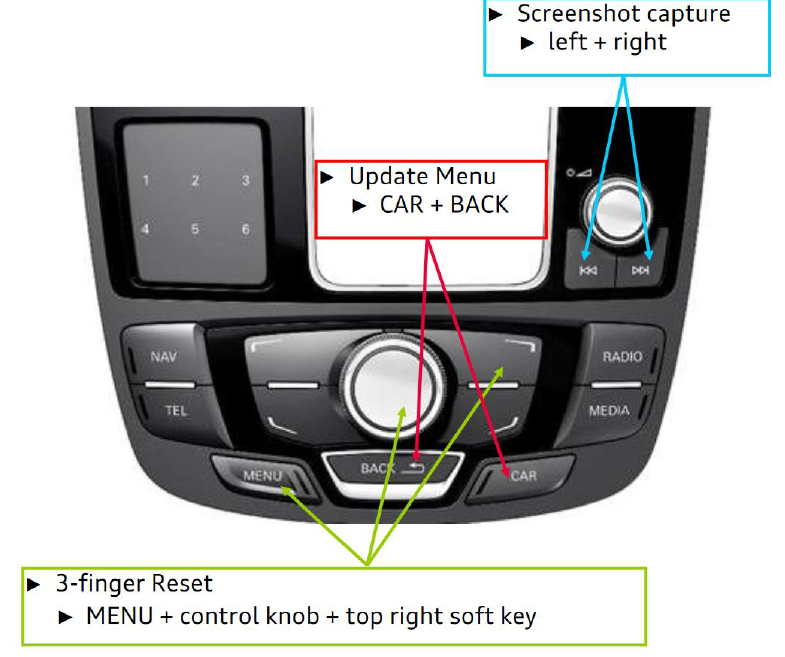
MMI 3G+ (navigation plus)
A4, A5 (since 2013)
MMI 3G+ (navigation plus)
Q7 (from 2012)
MMI 3G+
A8 (D4)
MMI 3G+ entertainment system for the rear seats
A8 (D4)

User defined mode
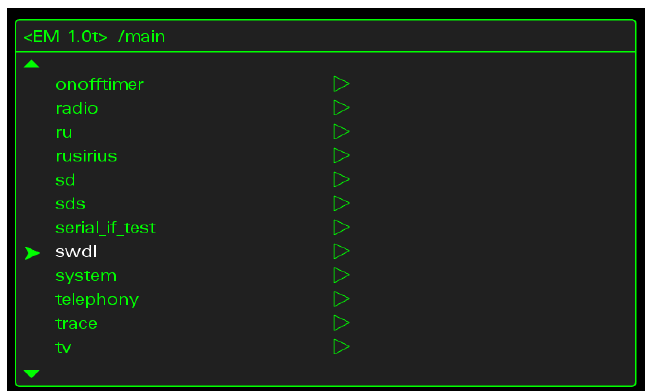
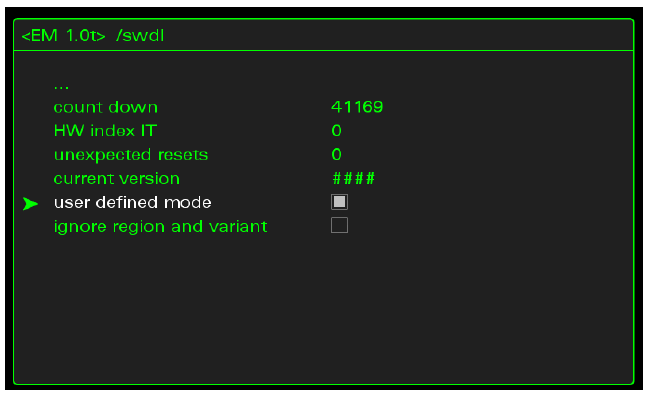
Do not reboot, just exit with any button (RADIO/MEDIA/AUTO).
Proceed with the firmware update as usual.
When the update starts, you can select "User Defined" instead of "Standard".
Bose specific
Uncheck all BoseG3_* components. It should look like this - N or N/A.
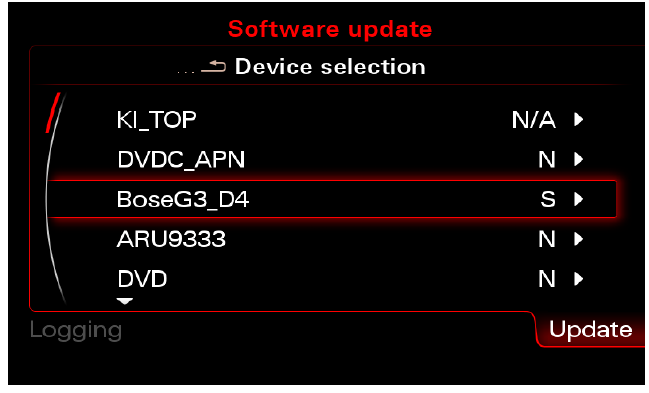
Log in to Bose, then go to the components selected for upgrade [Y] and make them [N].
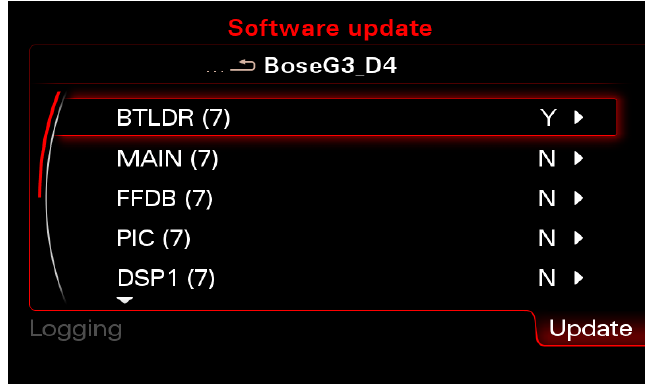
Uncheck where necessary.
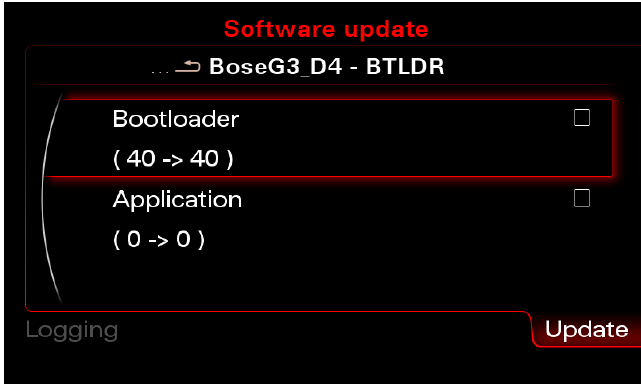
Go back and make sure all the components are [N].
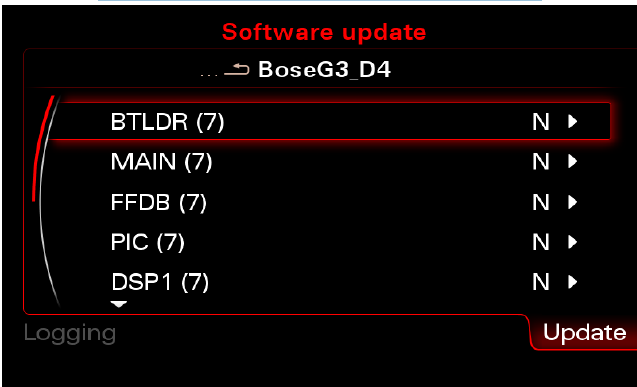
Go back again and you'll see a similar screen (focus only on the Bose/B&O line). 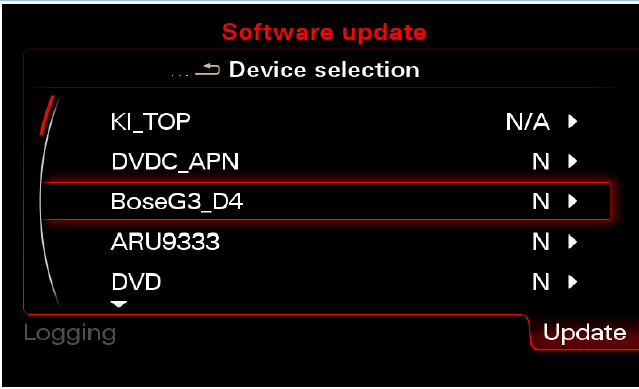
Firmware update
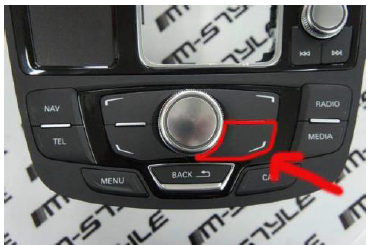
Open the "Engineering Menu" (Check the button combination for your car). The following screen will appear.
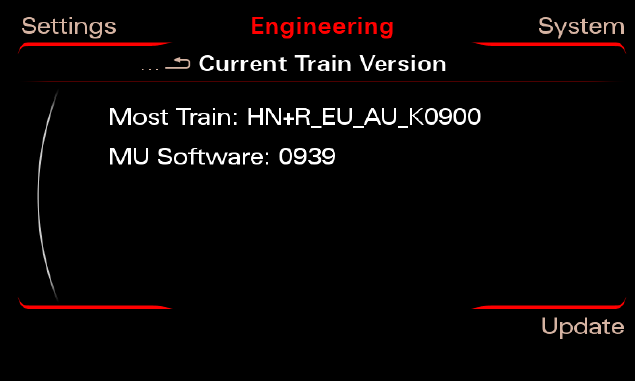
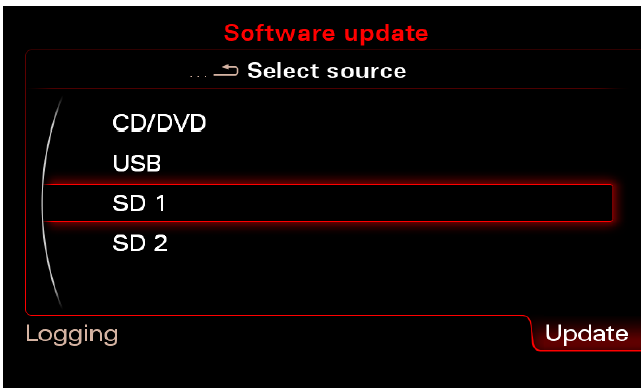
Insert the SD card with the firmware into slot 1 Press the "Update" option using the MMI control panel.
UPDATE INSTRUCTIONS FOR MMI 3GP (7T6)
Scroll down with the large knob and select the source in the menu (SD 1) by clicking on it.
Select the firmware by pressing the big knob once.
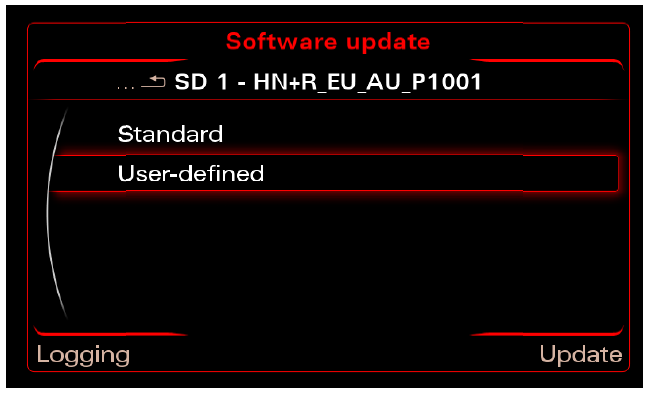
If your vehicle is equipped with a BOSE or B&O sound system (8RQ or 8RY), we recommend that you deselect it from the list (using the user defined mode) before upgrading.
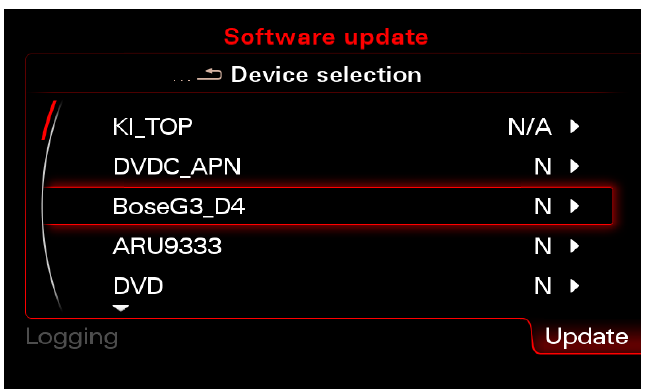
You will see a list of all the categories whose firmware will be updated
Scroll down and click Start Update.
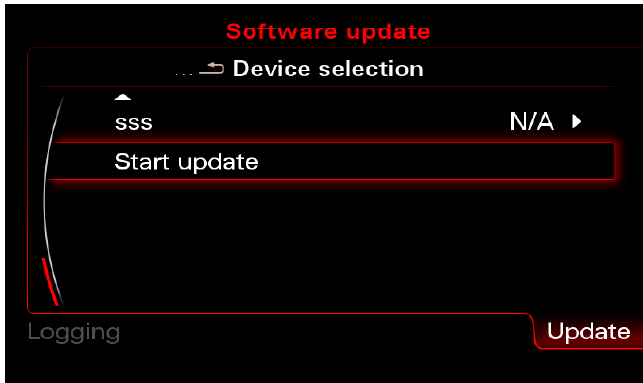
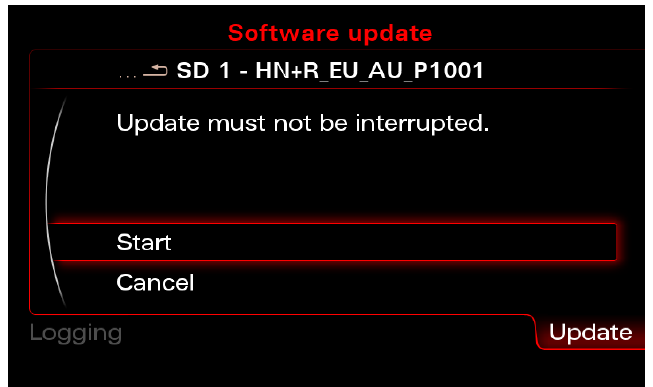
The update takes from 40 minutes to 1.5 hours, depending on the configuration of the car.
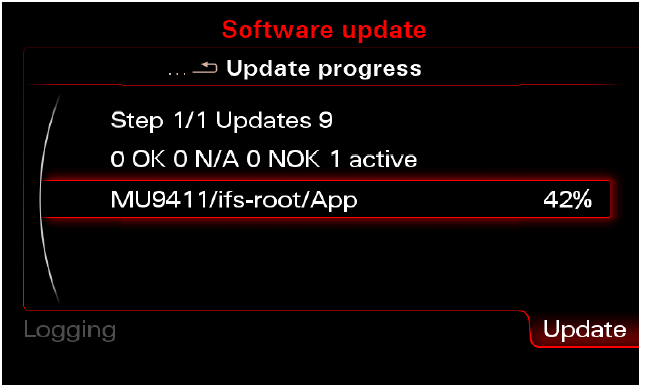
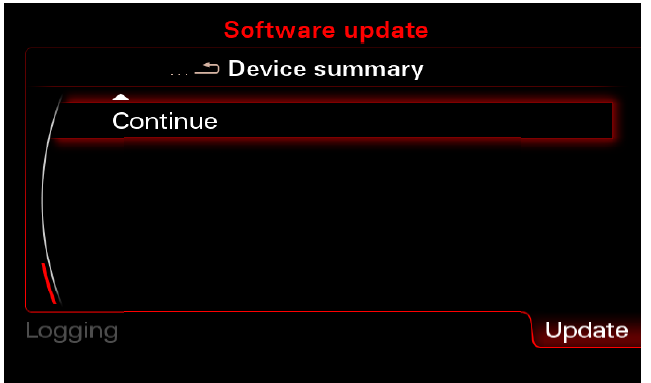
The MMI will reboot several times during the update. After the last restart, you will be presented with a summary screen.
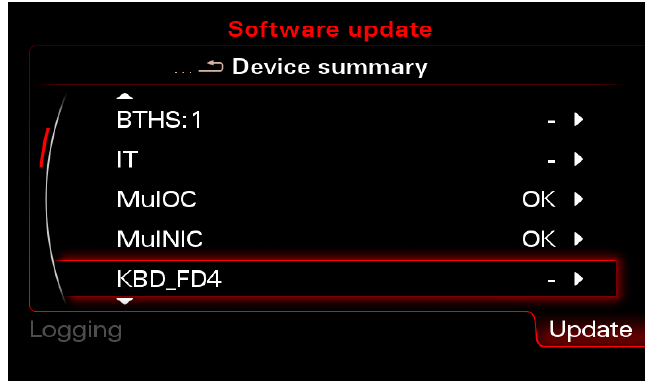
Scroll down and click Continue.
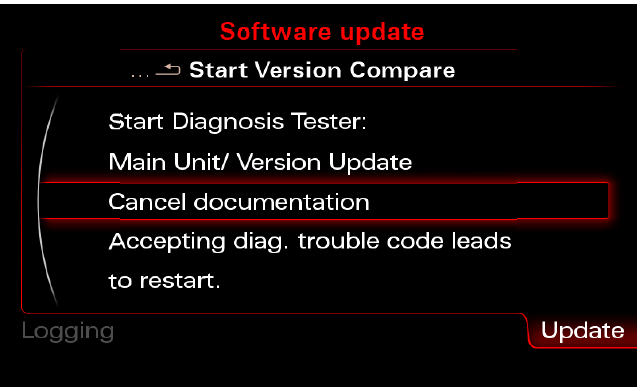
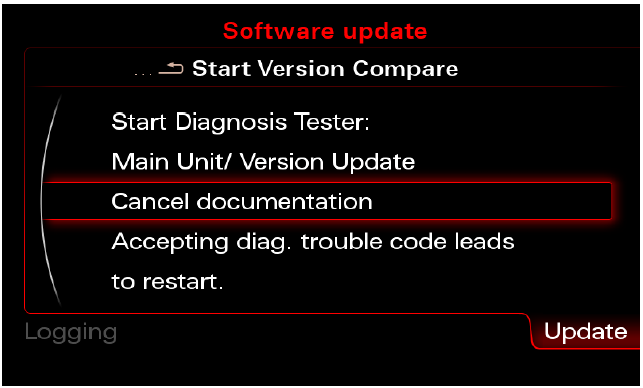
On the next screen, select Cancel Documentation and the MMI will reboot.
Update the MAP
Optional: It is not recommended to remove the old map unless you are changing the MMI region.
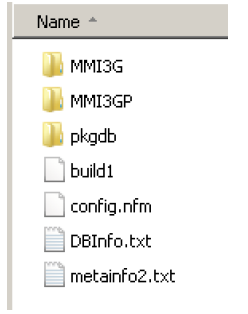
Format SD to FAT32.
Copy the root of your SD card (as in the picture below).
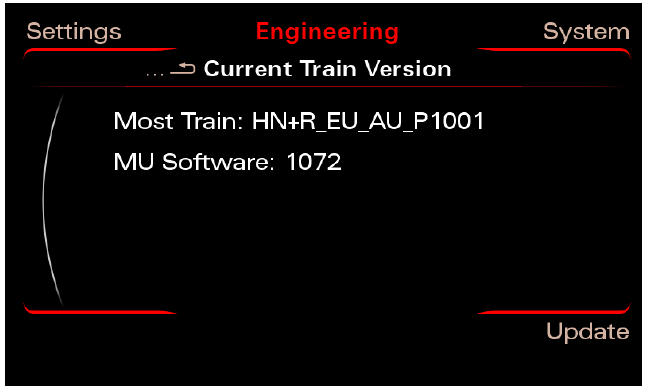
Enable User Defined Mode and then open the Engineering Menu (check the button combination for your vehicle).
A similar screen will appear.
Insert the SD card with the map into the slot. 1. Press the "Update" option on the MMI control panel.
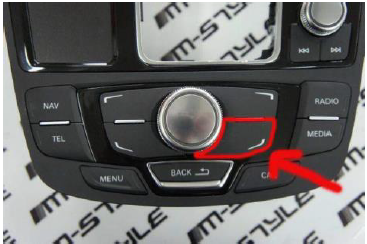
Scroll down with the large knob and select the source in the menu (SD 1) by pressing it.
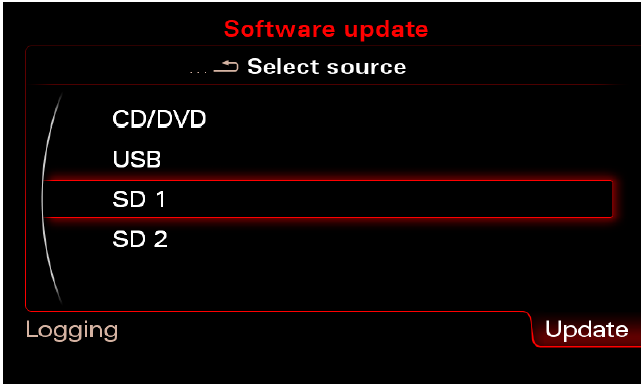
Scroll down with the large knob and select the source in the menu (SD 1) by pressing it.
Select a card by pressing the big knob once.
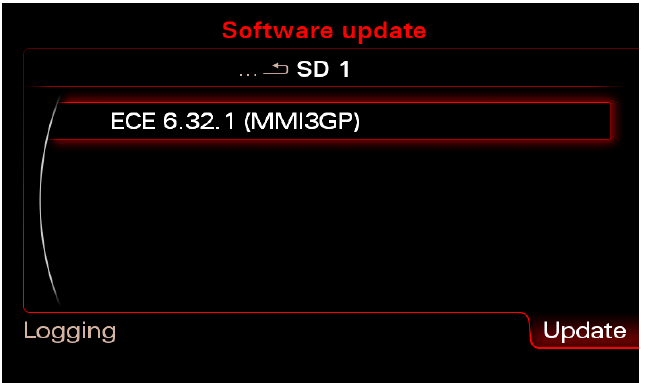
Select User Defined here.
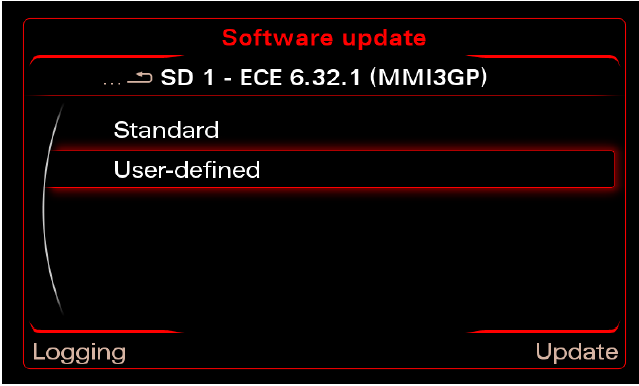
Scroll down and make sure the map is selected for update [Y]. If it's not [Y] but [N] or [?], go into the map component and move all items to [Y].
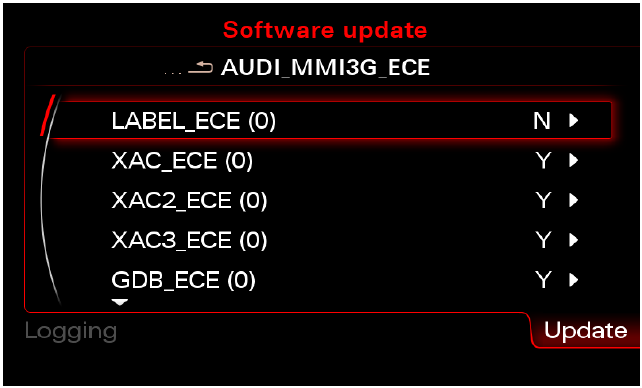
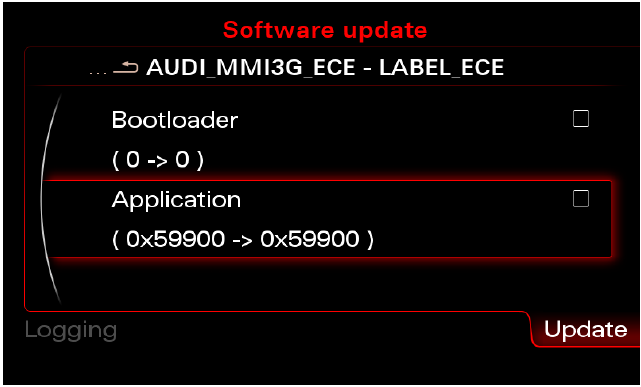
Check the Addendum.
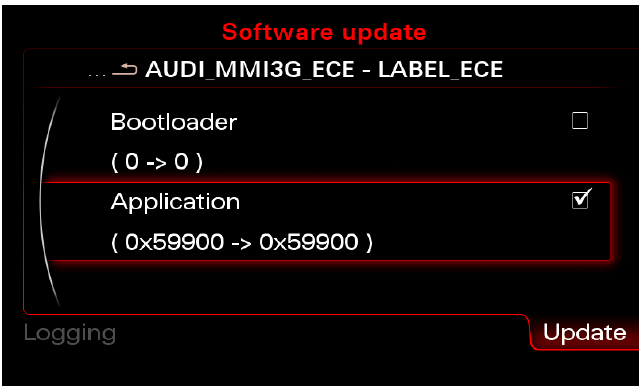
Then go back and repeat this for all the other items until they are all [Y].
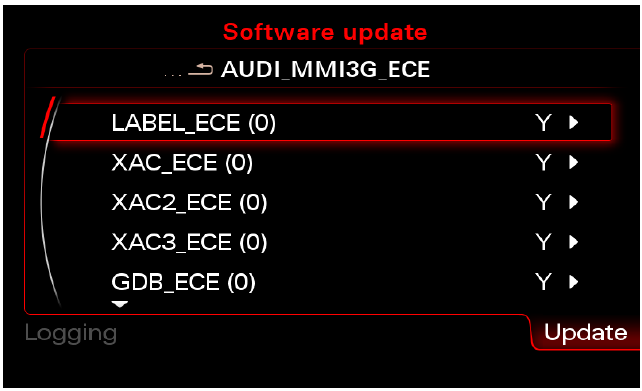
Now go back and the MAP component should be set to [Y].

Scroll down and click Start Update and then Start].
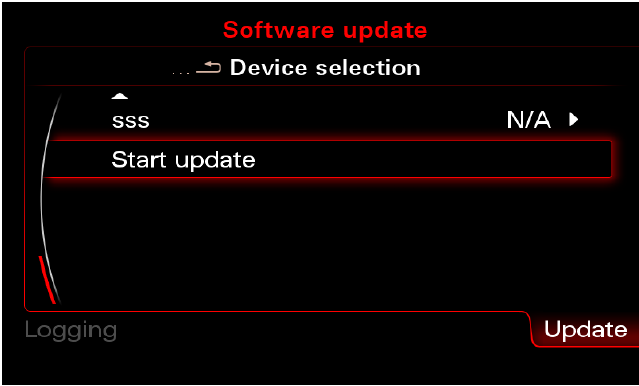
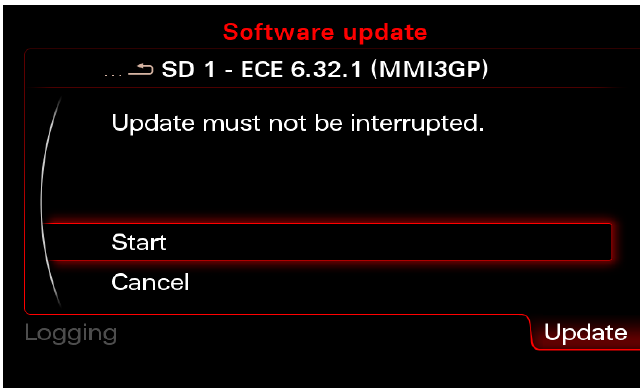
After about 1.5 hours the map update will be done, just select "Documentation cancellation/interruption details" and the MMI will reboot.
The Device Summary screen is displayed on the next overview screen.
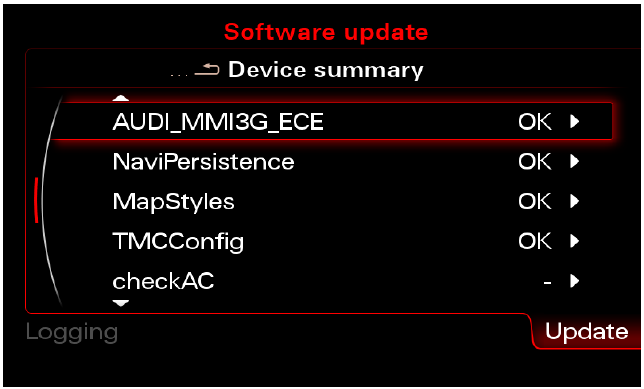
Scroll down and select Continue.
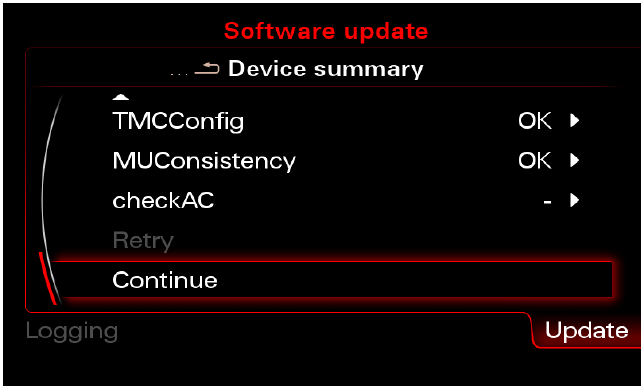
Since you don't have a connection to the Audi SVM, you need to "Cancel Documentation" here. This is the reason 03276 Check software version control in 5F Information Electr.
Activator
Format SD to FAT32.
Copy the root of your activation to the SD (as in the picture below).
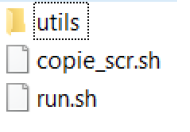
Make sure the MMI is fully loaded (press all buttons once RADIO CAR NAV MEDIA TEL).
Wait until all options are OK (options not grayed out), even if all options are OK, wait another minute.
Insert the SD card into the 1st MMI slot.
Wait ~ 15 seconds, if everything is done according to the instructions, the MMI will show this screen.
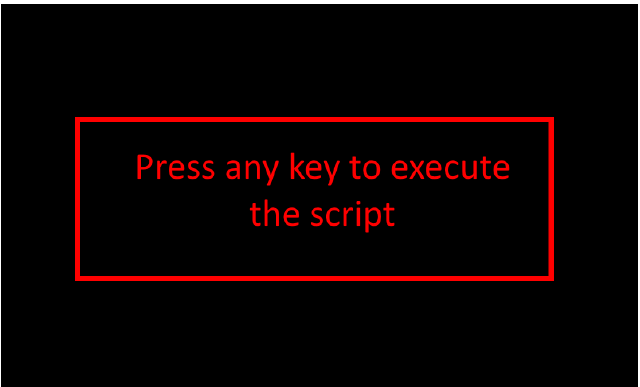
Press any key and the screen will change to this.
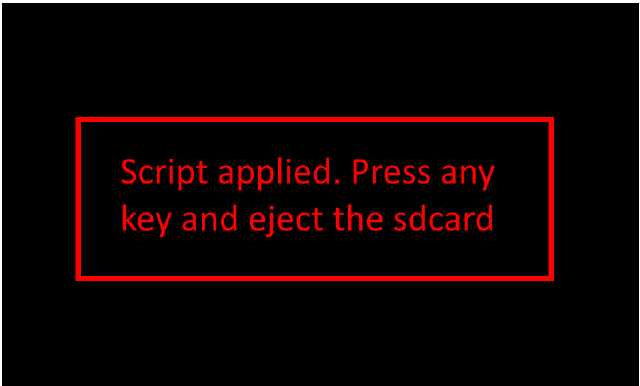
Restart the MMI. After that, the card will work.
03175 - Invalid data set
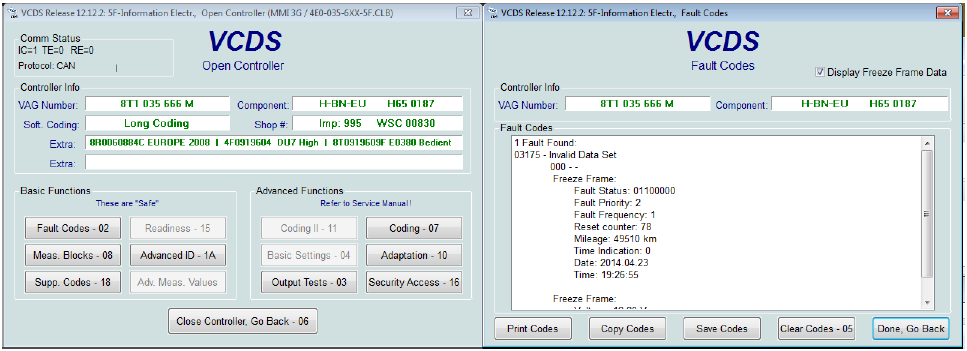

Open the Green Menu. Check the button combination for your vehicle and go to the vehicle/car menu operation:
- Attention 1: For each row, add 1 to the current value. It is recommended to take pictures
screen before proceeding to avoid any unpleasant manipulations.
- Attention 2: Don't forget to scroll down the list that is larger than the screen!
- Restore the original values by subtracting -1 from each row.
- Exit the hidden menu with the "return" button.
- Restart the MMI.
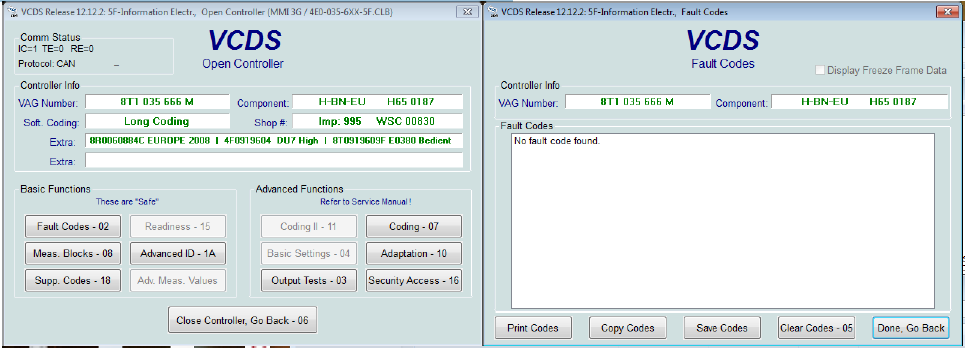
- Deleted!
03276 - “Check software version control
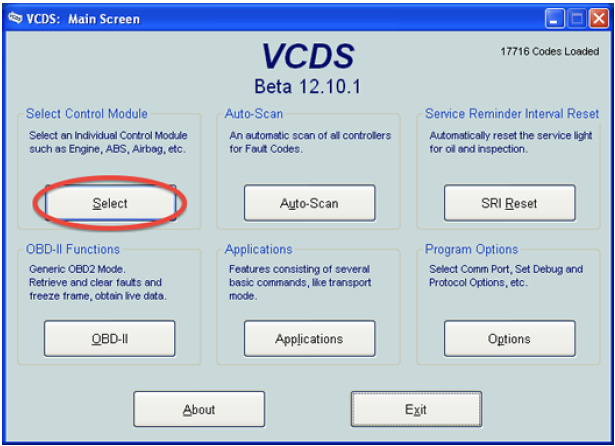
Generate SVM correction code To correct the error, a new code must be entered in the adaptation channel 15 of the navigation unit (5F). For beginners, I am adding step by step images and instructions: Open VCDS and select "Select Control Module":
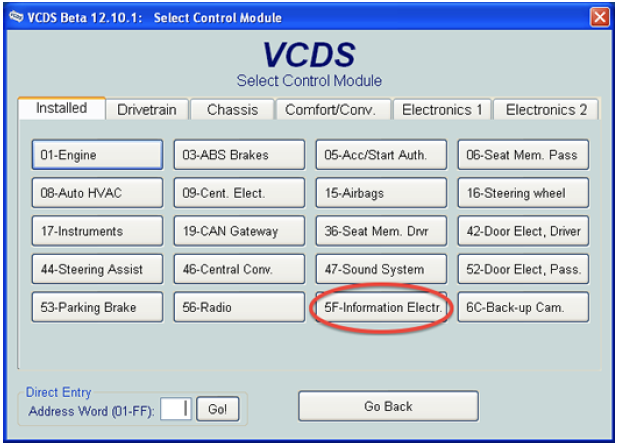
Select module 5F:
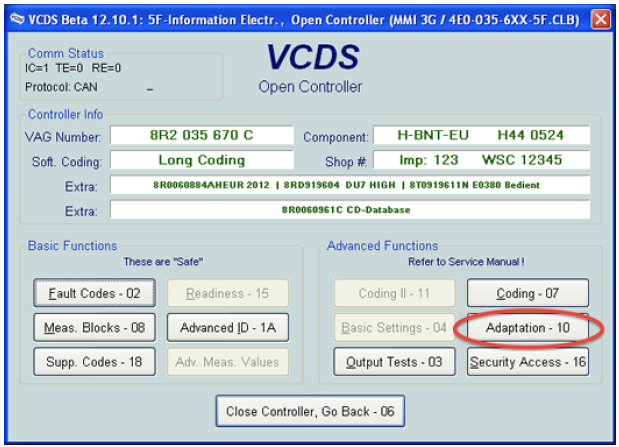
Click "Adaptation - 10".
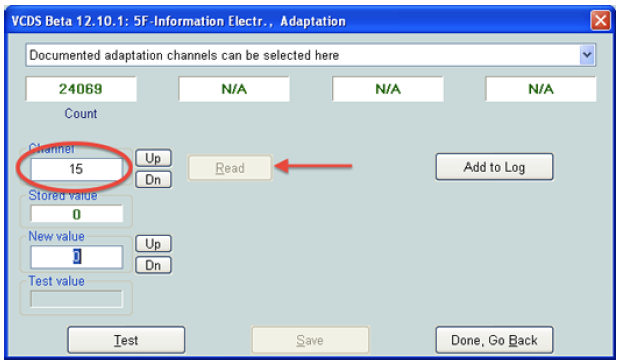
Enter 15 for the channel and click the Read button.
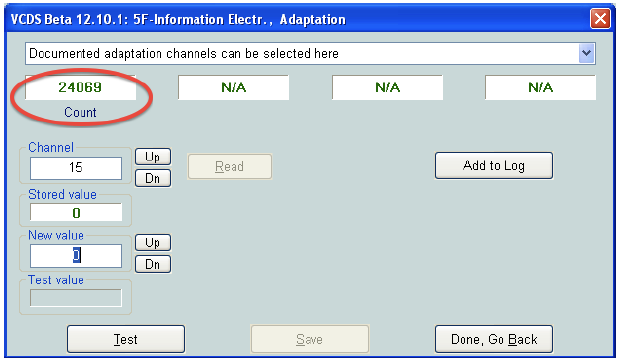
Enter the number above the "Calculate" heading into the Calculator below and click Calculate:
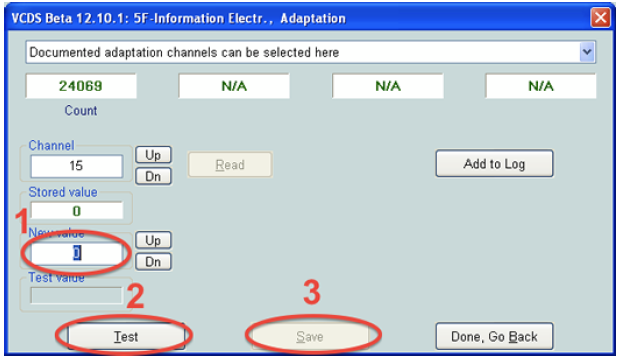
Now enter the value you just created in the New Value area and click Validate/Save. (Note that only "Save" may be available, in which case you will ignore the test instruction).
Exit Adaptation and return to the main screen (click Done, Return). Press "Fault Codes - 02":
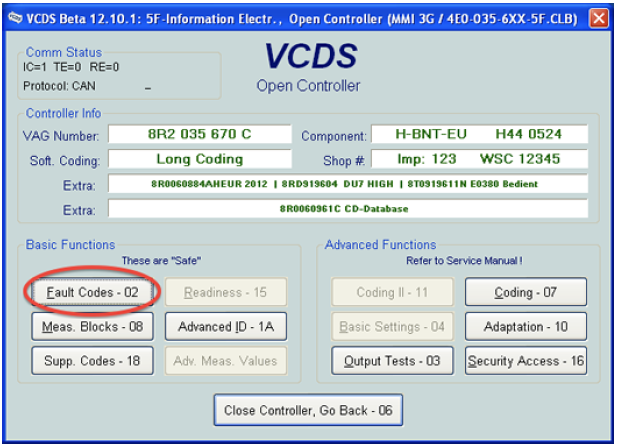
If you see any errors, click "Clear Codes - 05" and then "Done, Return".
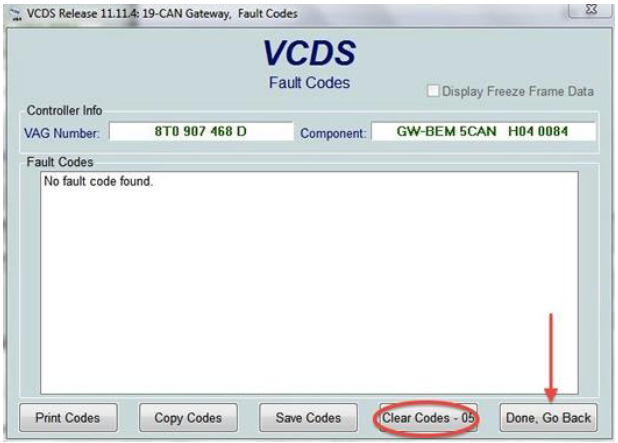
Now check the error codes again and the SVM error should disappear. If not, repeat the steps again.
Compute the new SVM code
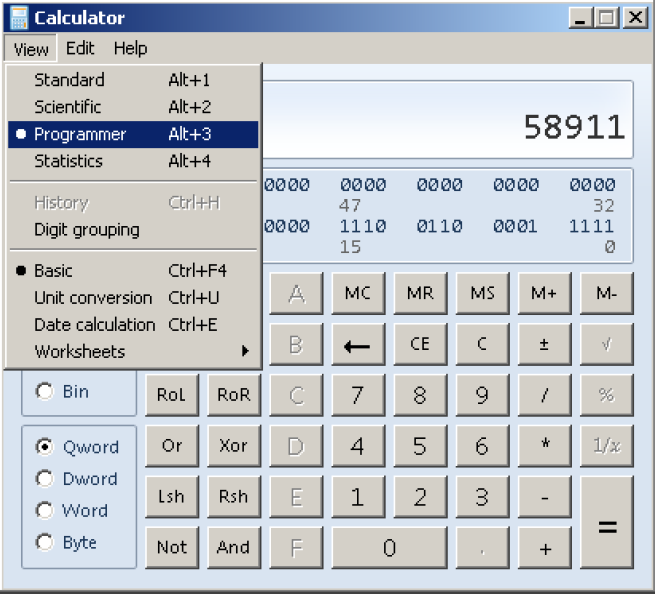
Compute the new SVM code. Go to "Programmer".
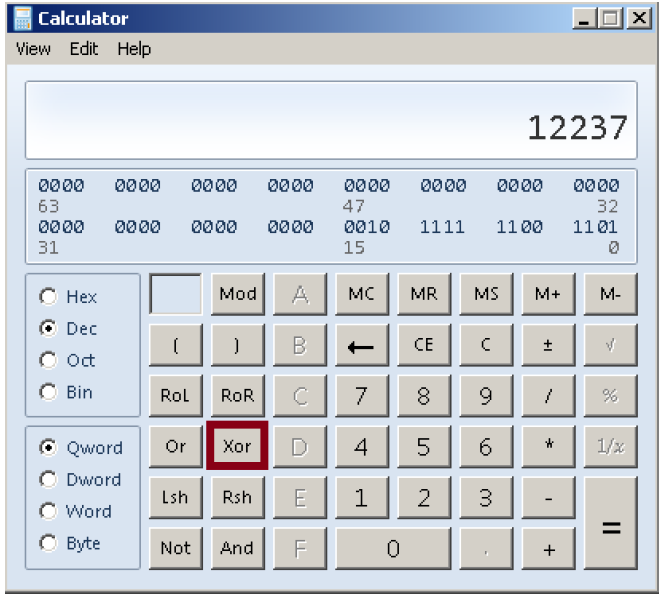
Compute the new SVM code:
1. Go to "Programmer".
2. Enter channel number 15 and press "Xor".
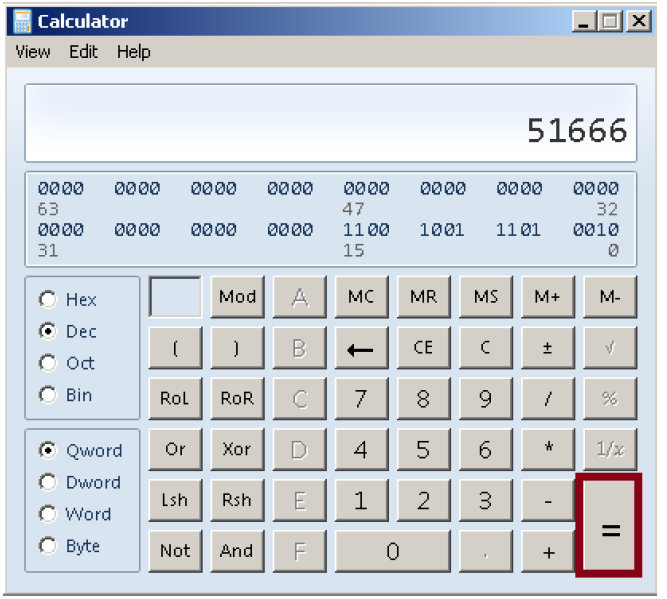
Enter the number 51666 and press "=".
This guide was originally created by Carpediem and updated/enhanced by DarkDll. Avtoad thanks these people for such valuable work, as well as for access to the material.